Wednesday 27 February 2013

It got Better!

Another post about Cigar!
Maybe one day I'll finish him, and then I can stop filling my blog with countless pictures of the (slow) progress.

I figured this particular progress blog-worthy because, well... He has eyeballs now.

P2274273

Obviously not finished eyeballs, but eyes none-the-less!
Maaaan it's amazing what a bit of expression can do for a model. I was getting more and more discouraged with Mr. Cigar- almost to the point of putting him aside completely.
Instead, I completely re-did his body colour and gave him some eyes and started his whites.
Suddenly, I'm not so discouraged any more.


P2274276


P2274278

He's coming together nicer than I expected.
In fact, I really like him. He'll make a nice edition to the shelf ponies. And well, he's a bit of a milestone.

The only things left to do:
- finish up the whites/hooves
-sharpen up the edges
-gloss eyes/ hooves

...and then he will be done!

Monday 25 February 2013

I Finished Something!

Well, the portrait ISH is done! Weee!

Just a small moment of self-congratulating:
I AM SO PROUD. The shakiest hands in the world (thanks Dad) and I can do DETAILS.

Tonot finished

Mostly minor details were changed with this boy. He got a new wonkyfied blaze (which ended up in me repainting his whole face... don't ask) two hind stockings, and some expression in his eyes. I also did a bit of roaning on his tail head.

  Tonto finished 2

The eyes are my favourite. The light hits the glaze PERFECTLY and gives his eyes some depth and soul. Love it. *dances*

That awesome effect of the eyes was actually an accident. I glopped on too much glaze (of course) and thought I'd just let it dry.
Half way through the drying process, I changed my mind and tried to take some off. It ended up giving a lovely opaqueness to the outside of the eye, while leaving the inside nice and clear.
You can bet I'll be trying to re-create that mistake.


Tonot finished 3

My flash washed out some colour. He actually has a nice pink nose. So kissable.


Tonto finished 5

That was a very enjoyable project. It taught me a lot too.
Mostly that I CAN do details, and my biggest downfall is (and will continue to be) body colouring.
I'm thinking about trying pastelling again.  I'm going to try and save some cash to buy some top-quality pastels instead of the cheap-o pack from the newsagency.
Saving cash for my model horse fund is turning to be quite difficult. I'll do a post listing all the delicious (expensive) things that are coming in my mail box in the next month.

Now time to start the white markings for Cigar!

Thursday 21 February 2013

Another fun project

I love me a fun project... try SEVEN fun projects! Woo!
My friend was throwing away all her childhood toys, and invited me to take whichever models I wanted. Ended up with a bunch of Schliechs, a couple of stablemates... and a couple of cheap plastic no-brands who will be on the receiving end of some experimentation. Mwahahah!

She also showed me an old Breyer DIY kit that she had attempted as a child. She gave me free rein to re-do it into a more accurate portrait model of her ArabXpaint pony mare.
I stripped the gross mo-hair, sanded her down... and then got a bit creative.

I give you: my first ever attempt at sculpting a tail AND a braided mane. (Don't laugh!)


P2214270

Obviously I'm not done painting her... she just has a base coat and basic mapping of her spotty goodness.
I WAS proud of the tail... and then the end snapped off. Poo. Helloooo super glue!

P2214271

The braided mane was half a success. Perhaps not properly in scale.... but I'm super proud of the forelock braid.
Proooobbaaabbllyyy should have made the 'bumps' a bit smaller. Oh well. For a first try/experiment, I'll call it a win.


P2214272

Amazingly enough, I used the same shitty clay I used on the cigar model... and I did NOT have any troubles at all! No idea what made the Cigar mane such a fail!

Excuse me while I go have an absolute blast with my plastic ponies.....

Saturday 16 February 2013

Progress Report: Cigar

Why is it that I can take two consecutive photos... and they come out completely different colours?
Anyway, the first picture of Cigar is most accurate colour/shading wise. The second photo somehow got washed out. :S

P2174241


P2174243


I'm getting there!
The face shading is more or less done (and I'm pretty proud)- ditto with the back cannons.
I'm 99% happy with the right hand side body colour/shading, but still need to add shading to the left side.
Thank goodness I'm finally getting to the details!
If I can manage to nail at least SOME of the details, I think I'll end up being pretty happy with my second ever attempt at painting!

As always, it can only get better!

Thursday 14 February 2013

Yay Mail!

Lookit what I got in the mail today!!


P2154229

(Photo bombed by my axolotl)

I actually love the ISH model. I'm not a real stock horse person IRL, but this model appeals to me. This pretty boy is turning into a portrait model for a very dear friend.
He needs a wonky-fied blaze and another sock... plus a bit of white hairing here and there. He'll be a challenge, for sure.
Her horse is TECHNICALLY a minimal chestnut rabicano. It's so slight that I'd probably get away without the white hairing, but I'm going to give it a shot anyway. White pencils come at me!

P2154232

I've already starting turning his perfectly symmetrical blaze into a wonky blaze. Base coat- check!
The bottom left of the blaze came out spot-on colour wise, but the top needed a bit more work once I took this photo.
(Note to self- take photos AFTER you've finished for the day)

I used a mix of yellow ochre, burnt sienna, burnt umber and scarlett to make his chestnut colour. I'll probably add a but more scarlett for the top coat.

P2154234

A better shot of the lower left hand side colour matching.

It's nice to have two projects on my desk. The Cigar model is giving me a bit of grief. I think he needs a rest.

It can only get better!


Saturday 9 February 2013

Work with me, here.

Awww crap.


P2104207

You know how I said I was getting really lucky with my colour choices being spot on? Yeah, well... that luck had to run out eventually. HOW could I think that much black was a good idea?? Oy.
Worst part it, that offending black ear is STARING at me and I can't do anything about it until it dries.
Also- see all that crusty stuff on the neck? Yeah. That stupid clay.
Never, ever using that crappy clay again.


P2104210

'The other side' is doing... mediocre. Rookie mistake painting one side at a time.
I had to re-do the base colour, and now I'm impatiently waiting for the paint to go 'tacky' so I can start proper shading.
I've decided the legs need to be re-done too.


I'm thinking about re-visiting an old friend.
This Stone drafter has caused me a lot of trouble. I bought him extremely cheap with a seam split and wonky legs. And rough spots. OH GOD those rough spots.

P2104212

I straightened the legs, and I started trying to smooth out his roughness.... but I gave up. There just seemed to be no end to sanding.
He was also my first experiment with pastelling. It obviously didn't go very well.....
I think he would look nice as a grey, but I'm not sure if I'm ready to tackle such a difficult colour. I'll start prepping him once the Cigar is done, and hopefully I won't get too discouraged this time.

I have an ISH on it's way too. I promised my friend a portrait model for Christmas. If I'm lucky, it'll be done by next Christmas :P.

Wednesday 6 February 2013

Shading started!!

The paint went 'tacky' a lot sooner than I anticipated. I've found that waiting until the paint is kinda of smudgy makes shading much more easy.
When it's too wet (or thin) brushing somewhat firmly tends to take the paint off, rather than put it on.  When it's fully dry, it obviously doesn't blend as nicely.
For the first shading colour, I used the same mixture as the base colour (2/3 yellow ochre: 1/3 burnt sienna) and added burnt umber as needed.
It was JUST the right choice of colour (yeah.. I got lucky. Usually takes me a couple tries before I get the colour I want) and I'm not gonna lie... I'm pretty proud of today's effort.


P2074229

No you may NOT see the other side. It's failing right now....Lets just enjoy this side, eh?

I'm getting more and more angry at the mane. I managed to remove the flaky particles covering the model (see how smooth it is?? Mmmm) but it just doesn't look very nice. The plain black paint is making it look kind of 2D, and I'm not sure if it's my (lack of) sculpting talent or my colour choice that is at fault here.

Anyway, I'm undecided to whether I'll add some darker shading or not. As of now, the colour is SPOT ON my reference, but I'm sure I could make those highlights pop ever more...
Decisions, decisions.

I also have NO CLUE how to go about his dorsal stripe. Mr. reference horse has a pretty distinct black dorsal stripe that stops at his hip, but it's all looking a bit... fake right now.

Speaking of Mr. Reference horse, I'm going  to go lunge him and take a break from painting.
Wee!


Tuesday 5 February 2013

He has a Base Coat!

I FINALLY got a base coat on my Cigar model.
Apparently no-one wants to reveal their secrets of oil paints vs. model horses and the various colour combinations that make up a bright bay horse....(Well, for the right price??)  so it took a LOT of trail and error to find the perfect base colour.
Raw sienna wasn't working, burnt sienna and burnt umber were far too dark....
And then it hits me! Yellow ochre! Of course! I mixed about 2/3 of yellow ocre with 1/3 of burnt sienna and came out with this (note: colour is lighter on film than IRL) :

P2064225


And here is my reference horse:

P2054209
(innee cute?)

With the appropriate highlights and shading I think it will come out pretty spot on.  After I took this photo I finished off the black shading on the lower legs and blocked in the black mane. Once again, I regret my choice of material for the mane. Even with a couple coats of primer, the darned clay was moulting EVERYWHERE and getting into the fresh paint. Now instead of a perfectly smooth horse, I have little flakes of dried clay here and there. Not. Happy.
I might be able to fix it. Or I might just leave it. He's destined for the shelf anyway.

I'm feeling pretty good about painting with oils. Before the madness of model horses, I had NEVER painted with oils, and now... I prefer them over anything else. I tried pastels. Lets just say that my finished product looks like he rolled in sand. Acrylics are great for markings but I can't imagine shading with such fast-drying paint.
Oil paints are perfect and no-one will change my mind until something terribly wrong happens and I need something to blame.

In a couple days I'll start shading the body and face...
It can only get better!

Monday 4 February 2013

Lets Just Take a Moment...

And drool over this:

gray lip. Jeanette Garey 2006 005


gray lip. Jeanette Garey 2006 001

That baby will come home to me one day. I'm half way through paying him off. I've thought seriously about not eating or driving my car for a week in order to bring him home sooner, but apparently that's not 'realistic'. Humph.
I searched for a loooonngg time to find a Lipizzaner model that I liked. Since I work at a Lippi stud (and adore the breed) I'm pretty picky about conformation and traditional coat colours. I mean, so many Lipizzaner models are painted as pintos or bright bays or other things that either don't exist in the current world, or are extremely rare. Even the transnational colours (bay to grey, dapple grey etc.) haven't been that believable in model form. Or if they exist, they aren't for sale :(.
I've also seen a few Lippi models with stubby legs, or not enough substance or Andalusian-esque conformation and movement. Blah. Not in this house!

But this guy... THIS guy... he's perfect. He reminds me a lot of the stallion at my work. In fact, the model may just inherit his name.

PB163773

Mr. Fancy Pants himself... Uncanny, eh?

Now to find money for a dressage set...... I can't have a fancy model and no tack! Blasphemy!

Friday 1 February 2013

A Strict 'Don't Laugh' Rule.

Hi everyone. I'm Alicia, and I'm new to the hobby.
Like.... less than 6 months new. As in, 6 months ago I had no idea that people customized model horses and sold them for hundreds of dollars.
At first it was kind of like "People BUY these things? How can they justify spending $500+ on a MODEL?"
Then I was all, " I guess this could be considered art...."
Which turned into, "Droooooool, Gimme gimme!".
(I may also be currently paying off a rather expensive resin... Shhh...)

And so, I've arrived here, striving to be artistic and find a niche in the hobby - a niche that isn't just buying expensive models and placing them around my house.
I have a somewhat artistic past, but painting, sculpting and handling power tools were never my strong points.
To be honest, I'm a total klutz and I don't have much patience for fiddly and time consuming things. Sounds like the perfect hobby for me, eh? And yet something keeps drawing me back into model horse world. I can spend hours on Blab and MH$P drooling over one thing or another, and that itch to experiment is insistent.
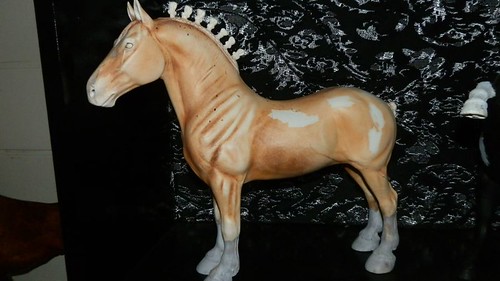
So I did what any (in)sane person would do. I bought a box full of reject models, some basic art supplies and starting reading tutorials like mad.
I haven't found my niche yet. I want to try anything and everything. The sky's the limit, amiright?

With the beginning of this blog comes a strict 'no laughing' rule (well, a bit of laughing is okay).  I have no idea what I'm doing, and it shows in my work. I AM trying, though. My goal isn't to have LSQ models or even to have high quality models. The goal is to keep my hands busy and my mind thinking in an artistic way, all the while enjoying myself. Above all, I want to make progress and improve as time goes on.

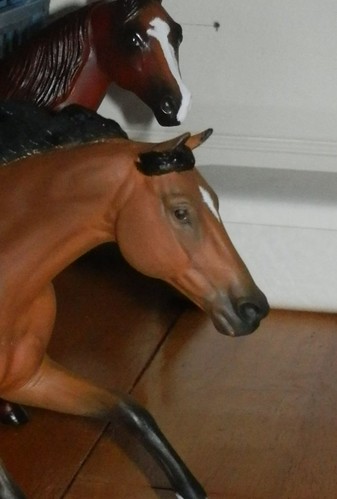
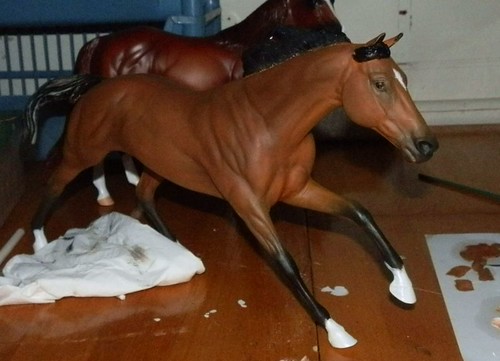
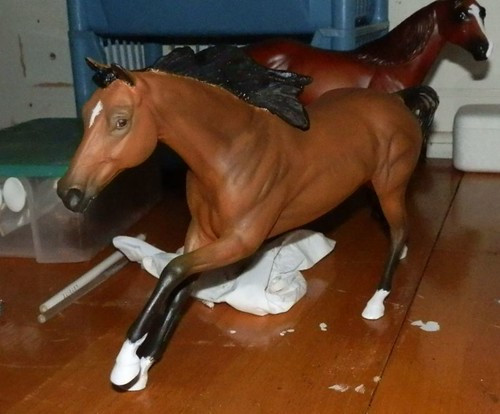
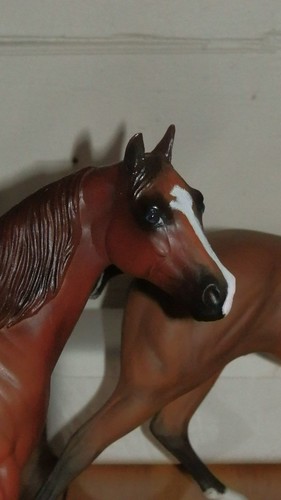
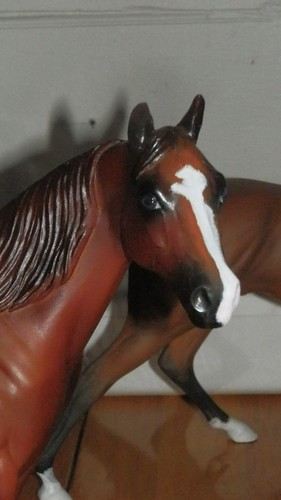
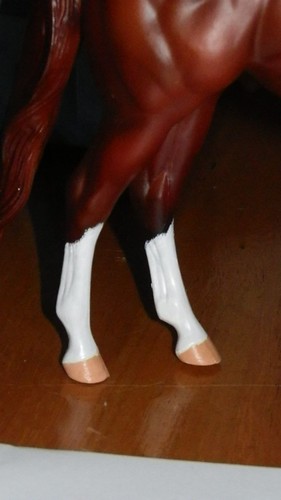
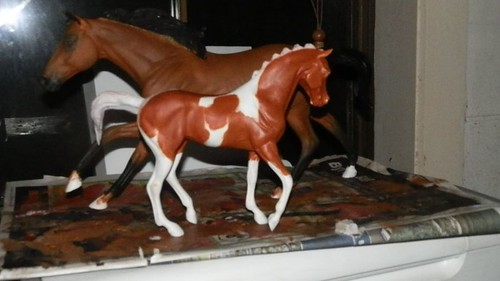
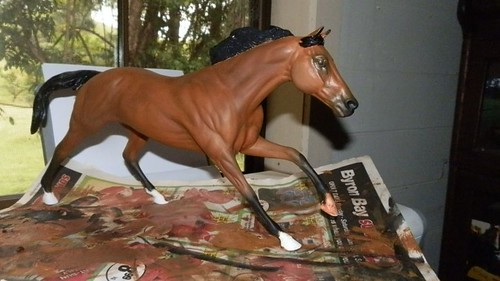
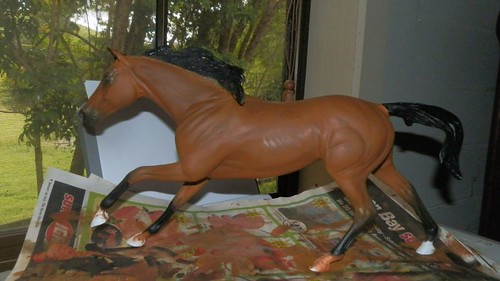
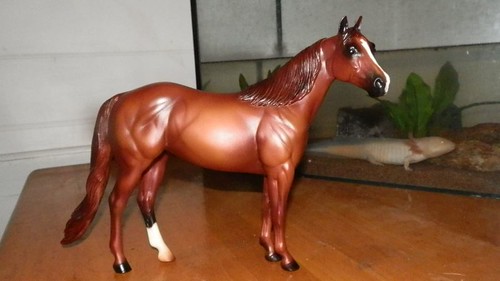
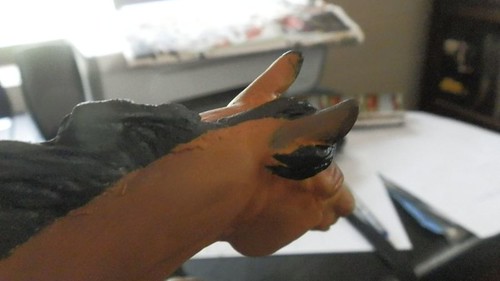
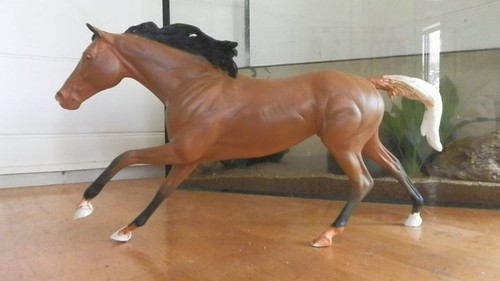
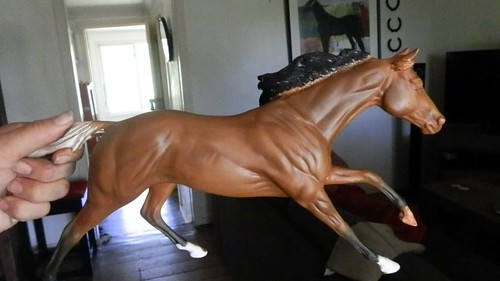
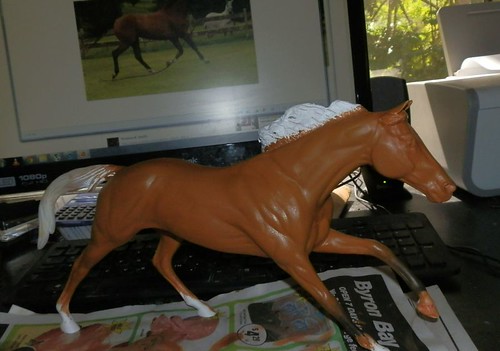
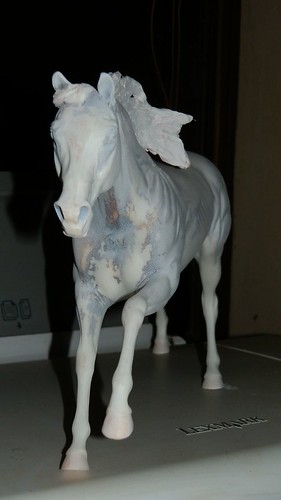
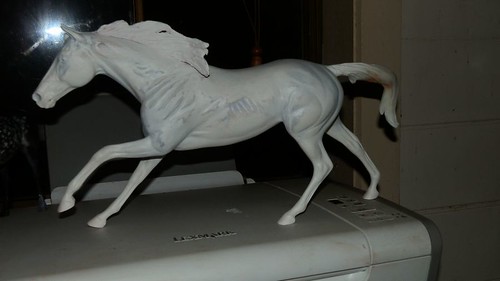
To start things off, here is a Cigar model with my first ever custom mane. Maybe not a total success, but I don't feel like scrapping it and starting again which is a good start! I think I can refine it a bit more with my trusty dremel and some elbow grease, and I'm hoping it will look better once painted.

P2014209
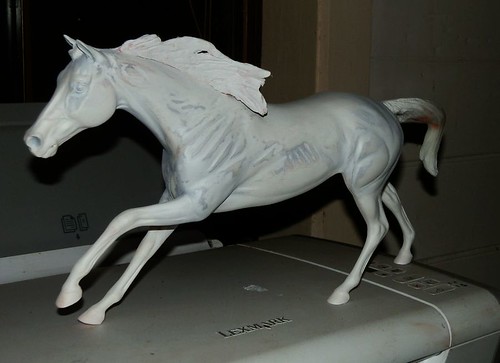
I spent 2 months planning this mane. I based it off a recent addition to my herd at work, a lovely TB with a rather luscious mane. Drilling and gluing in the armature was a bit hairy, but somehow it worked.

P2014211

I think next time I'll use a different clay. I know Apoxie/Epoxie is the No.1 choice, but I couldn't justify paying the price and shipping for an experiment, so I just went with the best quality air-drying clay I could find locally. I also need to spend more time on the actual sculpting and perfecting (did I mention I don't have much patience?).

P2014208
Oh well. It can only get better!